In this guide, we’ll explore common reasons why your fridge might not be cooling and provide step-by-step instructions for diagnosing and repairing your Thermador refrigerator.
The Significance of Proper Refrigeration
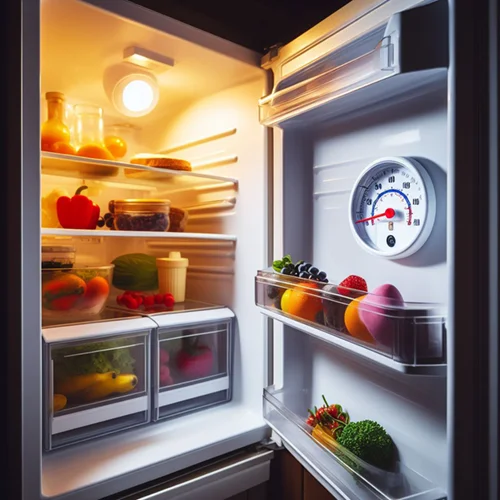
Your refrigerator is not just a convenient appliance; it’s a vital part of your kitchen that keeps your food safe to eat. Without the ability to cool and maintain proper temperatures, your perishable items can spoil quickly, leading to food wastage and potential health risks.
- A properly functioning refrigerator is a cornerstone of food safety. It keeps your fruits, vegetables, dairy products, and meats fresh and safe for consumption.
- Refrigeration inhibits the growth of bacteria and pathogens that thrive at room temperature, reducing the risk of foodborne illnesses.
- Refrigeration also helps reduce food waste and its associated environmental impact, contributing to a greener planet.
Understanding the Problem:
When your fridge’s interior light is on but it’s not cooling, it indicates that power is reaching the appliance. However, there are several components responsible for the cooling process, and a malfunction in any of them can lead to this issue.
- Refrigerators operate through a complex interplay of components, including the compressor, condenser coils, evaporator fan, thermostat, and air vents.
- Understanding the underlying issue is crucial for a speedy resolution. It can save you time and money, as well as prevent the loss of perishable items.
Common Causes of a Non-Cooling Fridge
Before we proceed with the troubleshooting steps, let’s identify the most frequent culprits behind a fridge not cooling while the light is still on:
Blocked Air Vents
- When your fridge is not cooling, one of the common culprits can be blocked air vents. Obstructed air vents within the fridge can restrict the flow of cold air from the freezer to the refrigerator compartment. This restriction results in inadequate cooling, as the cold air can’t circulate properly.
Dirty Condenser Coils
- The condenser coils in your fridge play a crucial role in the cooling process. They release heat from inside the fridge to the surrounding environment. Over time, these coils can accumulate dust and debris, hindering their ability to release heat efficiently. When the condenser coils are dirty, they struggle to perform their job, which can affect the cooling capacity of your fridge.
Malfunctioning Evaporator Fan
- Inside your fridge, the evaporator fan is responsible for circulating cold air. It ensures that the temperature remains consistent throughout the fridge. When this fan malfunctions, it can lead to uneven cooling or, in severe cases, no cooling at all. Your fridge’s interior light may still work, but without the evaporator fan, the cold air won’t be evenly distributed.
Faulty Compressor
- The compressor is essentially the heart of the cooling system in your fridge. It’s responsible for compressing and circulating the refrigerant, which is essential for cooling. A malfunctioning compressor can result in no cooling, even if the interior light of the fridge is on. In such cases, the refrigerator might still receive power, but the cooling system isn’t functioning correctly.
Damaged Door Seals
- The seals and gaskets around the doors of your fridge are critical for maintaining a proper seal. They ensure that warm air from the outside doesn’t infiltrate the refrigerator. Over time, these seals can wear out, become brittle, or develop cracks, allowing warm air to seep in. When door seals are damaged, it compromises the cooling efficiency of the fridge.
Refrigerant Issues
- The refrigerant in your fridge is responsible for absorbing and releasing heat, which is essential for cooling. Issues like low refrigerant levels or refrigerant leaks can lead to poor cooling performance. Low refrigerant levels mean that the cooling capacity is compromised, and a leak can reduce the amount of refrigerant available, resulting in inefficient cooling.
Troubleshooting the Issue
Initial Checks
Before delving into specific troubleshooting steps, perform some initial checks:
- Ensure that the refrigerator is plugged in and the power outlet is functioning.
- Verify that the temperature settings are correctly adjusted.
- Check if the condenser coils are warm to the touch. If not, there may be an issue with the compressor.
Blocked Air Vents
Step 1: Clearing Air Vents
If blocked air vents are the culprit, follow these steps:
- Empty the refrigerator and freezer compartments.
- Locate the air vents in both compartments and ensure they are not obstructed by food items or other objects.
- After clearing the vents, return the food items to the fridge and freezer, making sure not to block the vents.
Cleaning Condenser Coils
Step 2: Cleaning Condenser Coils
Dirty condenser coils can lead to inadequate cooling. Here’s how to clean them:
- Unplug the refrigerator or turn off the power.
- Locate the condenser coils, typically at the back or underneath the fridge.
- Use a vacuum cleaner with a brush attachment or a specialized condenser coil brush to remove dust and debris from the coils.
- Ensure proper ventilation around the coils by maintaining an adequate gap between the refrigerator and the wall.
Repairing or Replacing the Evaporator Fan
Step 3: Testing the Evaporator Fan
The evaporator fan ensures even cooling within the fridge. If it’s malfunctioning, follow these steps:
- Open the freezer compartment.
- Listen for the sound of the evaporator fan. If it’s not running, there may be an issue.
- If the fan is not operating correctly, you may need to replace it to restore proper air circulation.
Fixing or Replacing the Compressor
Step 4: Compressor Examination
The compressor is essential for cooling. If it’s faulty, follow these steps:
- Check if the compressor is running or making unusual noises.
- If the compressor is not running or making strange sounds, contact a professional technician for diagnosis and repair or replacement.
Inspecting Door Seals
Step 5: Inspecting Door Seals
Worn-out or damaged door seals can allow warm air to enter the refrigerator. Inspect and address them as follows:
- Carefully examine the rubber seals and gaskets around the fridge and freezer doors.
- Look for any signs of damage, wear, or visible issues such as cracks, gaps, or brittleness.
- Replace damaged door seals with new ones designed for your specific refrigerator model.
Addressing Refrigerant Problems
Step 6: Addressing Refrigerant Issues
If you suspect refrigerant-related problems, it’s important to contact a professional technician. Handling refrigerants requires specialized training and equipment. A technician can diagnose and replenish the refrigerant to the appropriate levels, ensuring proper cooling.
Now that you’ve followed these troubleshooting steps, it’s time to explore preventive measures to avoid future cooling issues and know when to seek professional help.